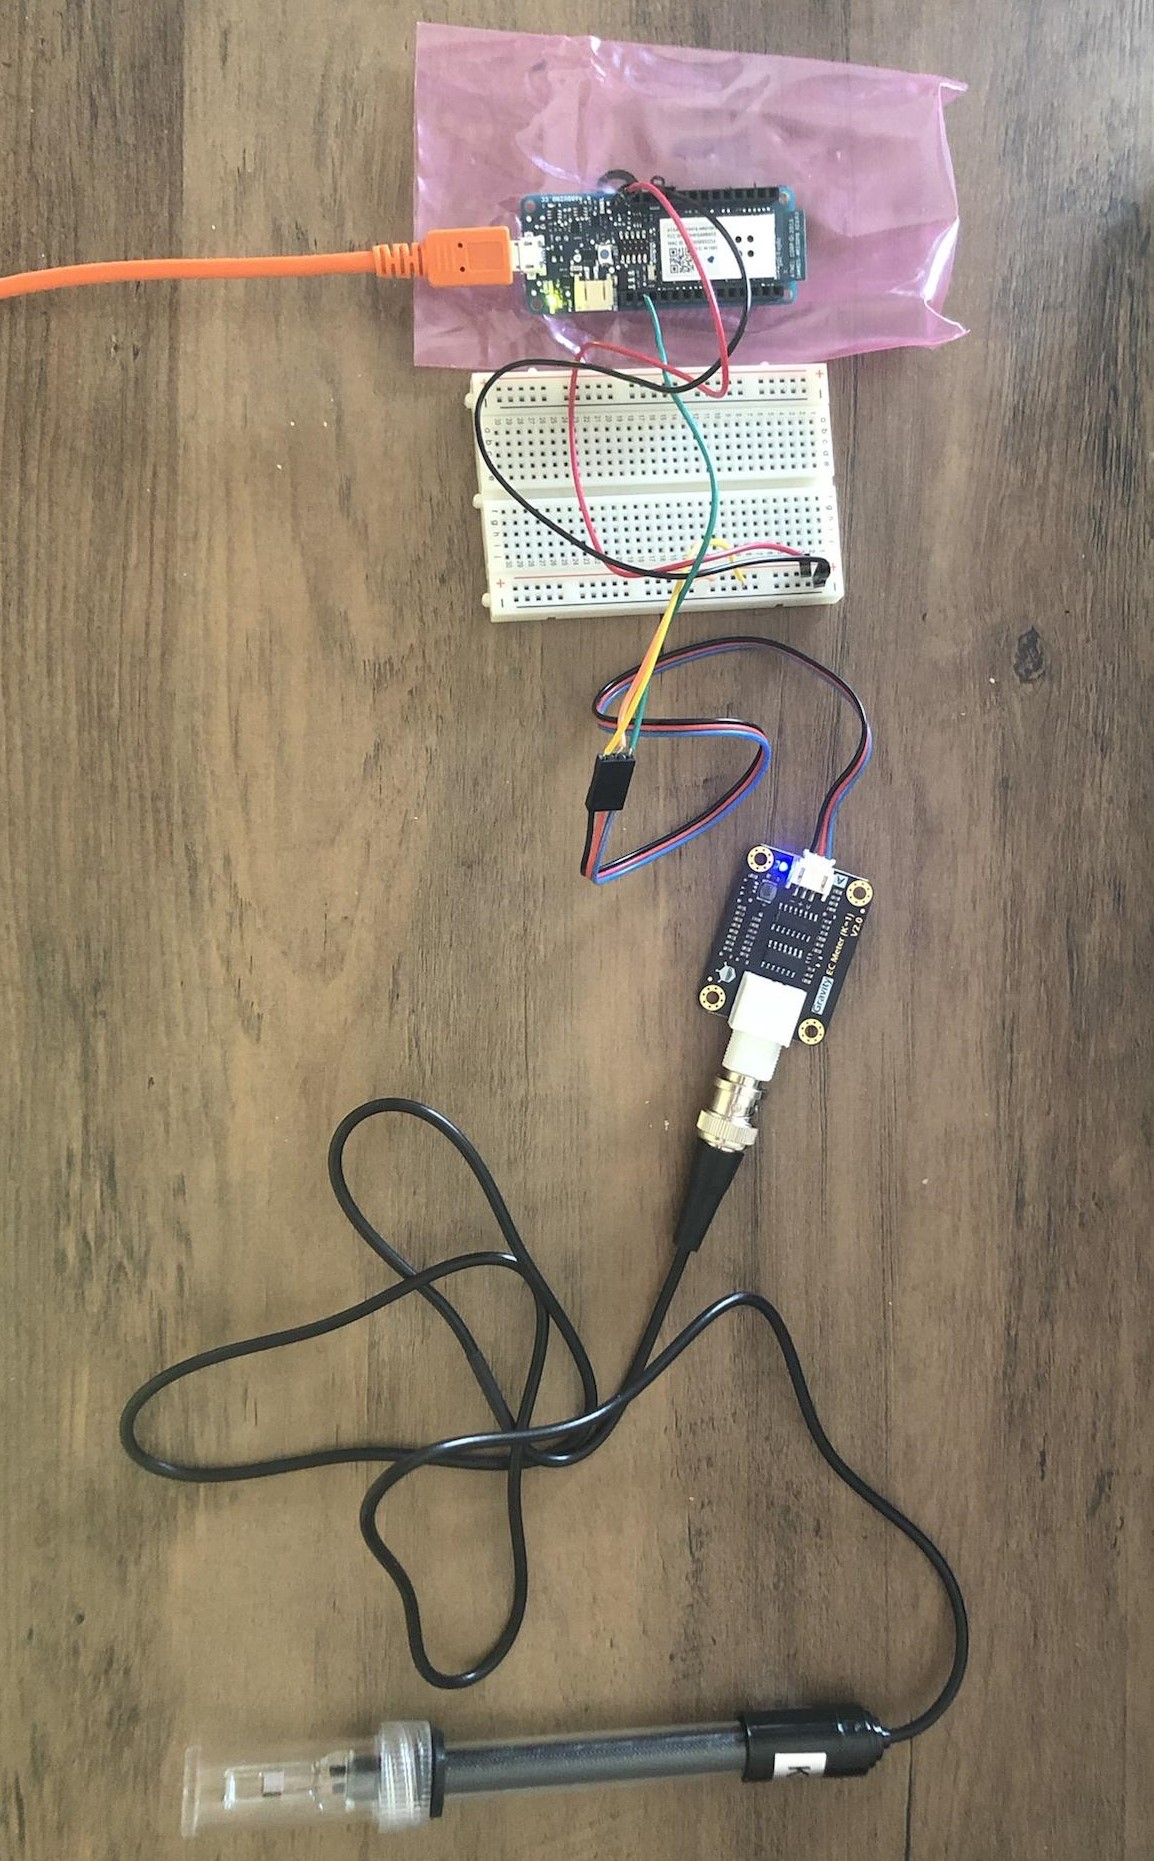
The other sensor needing a calibration is the EC meter. It’s the same exact method as for the pH sensor. Here is the setup:

Once again, just like with the pH sensor, DFRobot has coded some sample scripts [1] to calibrate the EC meter, but they are designed for AVR boards, so we can’t use them with Arduino IoT boards. Therefore, here is some code I wrote to test the sensor out:
int ecSensorValue;
float ecVoltage;
float ecValue;

void setup() {
  Serial.begin(9600);
}

void loop() {
  ecSensorValue = analogRead(A0);
  Serial.print("EC: ");
  Serial.println(ecSensorValue, 10);

  delay(2000);
}
To calibrate the EC meter, I used the two buffer solutions it came with. I dipped it in the 1413 µS/cm buffer and noted the voltage of 2.7057 mV. After cleaning the probe, I dipped it in the 12.88 mS/cm buffer and noted its voltage of 0.2758 mV. Just like with calibrating the pH sensor, I made a chart with this data, which is linearly proportional. It gives the following equation:
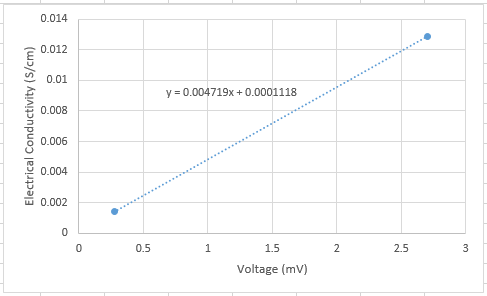
This trendline will also vary with the temperature of the environment, these readings were taken at 25°C. In warmer temperatures (noticeable at around a ~5°C increase), the water will generate a higher voltage. This is because the water evaporates even more, increasing the concentration of salt and other inorganic particles.
This sensor seems to take about 10 to 20 seconds to stabilize its readings. It is also the most sensitive sensor out of the five in this project, therefore the readings are a bit inconsistent at times. Also, it’s important to note that the voltage returned increases continuously so long as the probe is in the solution, so it’s best not to leave it in for more than a minute.
Sources
[1] DFRobot, “DFR0300 Gravity Analog Electrical Conductivity Sensor Meter V2 K=1”, DFRobot-Wiki. [Online]. Available: https://wiki.dfrobot.com/Gravity__Analog_Electrical_Conductivity_Sensor___Meter_V2__K=1__SKU_DFR0300
