To interact with all the different sensors, we’ll have to write some code. It will essentially retrieve data from all the different sensors, using libraries specific to each sensor. Since this is an Arduino project, I’ll be coding sketches with the Arduino IDE [1], which uses a language called Processing that is based off of the Java programming language. You can head to the download page here. The installation steps are very straight forward, just verify the download location and click “Yes” on all the pop-ups.
We can now open the Arduino executable. On a fresh installation, we still need to do a couple steps. Firstly, head to the “Tools” dropdown and head to the “Boards Manager”. We need to tell the IDE which microcontroller we will be using. Some boards are preloaded in the IDE, in “Arduino AVR Boards”. However, IoT boards and others are not, so we have to download a library to include it.
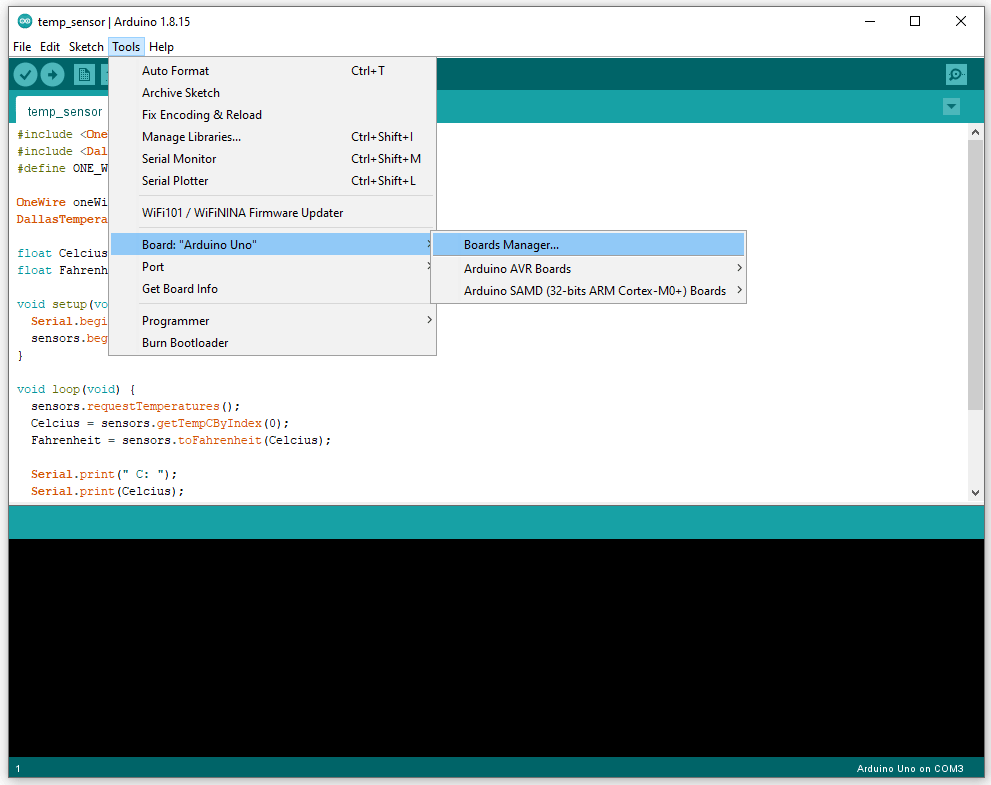
In the Board Manager, find the correct library for the board you are using and download that library. Almost every IoT board is in the “Arduino SAMD (32-bits ARM Cortex-M0+) Boards” library. This one includes the Arduino MKR NB 1500 board, used for this version of H2OSupport.
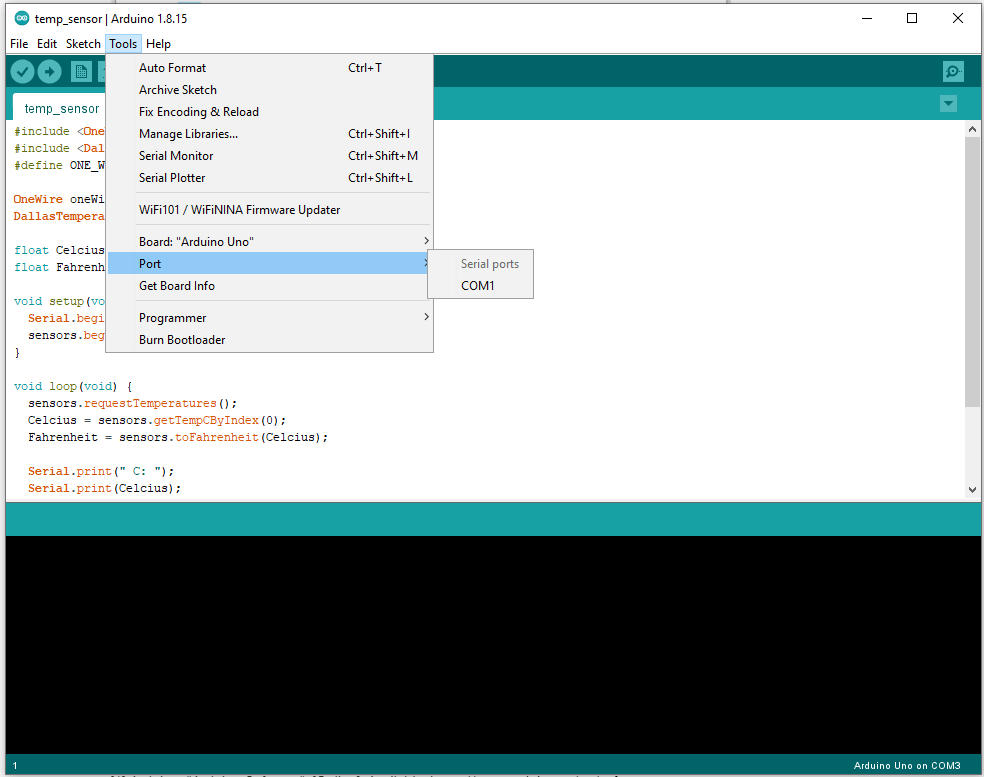
One your board is selected, we need to select the COM port which it uses. To do this, head back to “Tools”, then “Port”. Check which ports your computer is currently using.
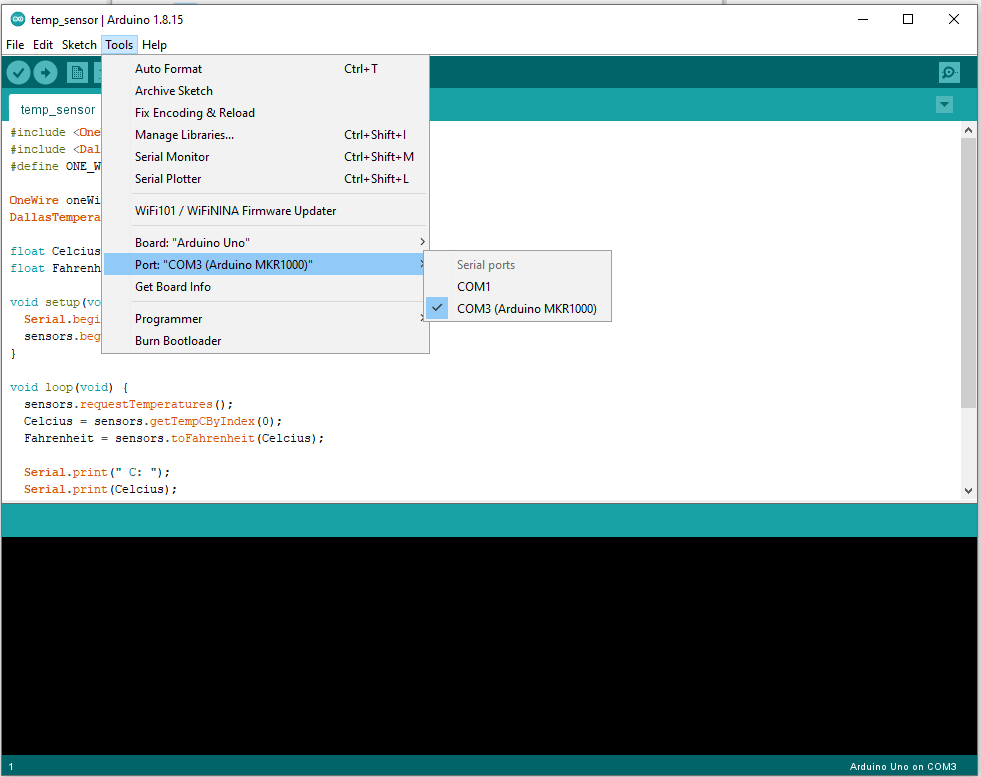
Then, plug in your Arduino. Head back to “Port”, a new port should have appeared, select that one. My computer recognizes that I’m using a MKR1000, which is correct (I will use the MKR1500 later on), but if your computer doesn’t recognize your Arduino model, that’s completely fine. Just select the new port that appeared once you plugged your device in:
Now that our IDE is all set up, we can run simple preloaded code to test it out. Head to the “File” tab, then “Examples”, “Basics”, and finally “Blink”. Once the file is opened, we can upload it to the Arduino. To upload, click on the Upload (arrow) button, next to the Verify (checkmark) button. Wait a few moments, and the LED on top of your Arduino should start blinking in one second intervals. If you want to have fun with the blinking, you can edit the code to test out different timings and save it as your own project.
On a final extra note, I spent a whole day trying to fix a certain exception, "Port busy". The culprit was NZXT Cam's software. If you too frequently use Cam, you'll have to close it while using the Arduino IDE, because it automatically tries to control Arduino devices. As of now, neither NZXT or Arduino provide a workaround for this issue, so a simple fix is just closing Cam when working with Arduino.
Sources
[1] Arduino, “Arduino Software”. [Online]. Available: https://www.arduino.cc/en/software
